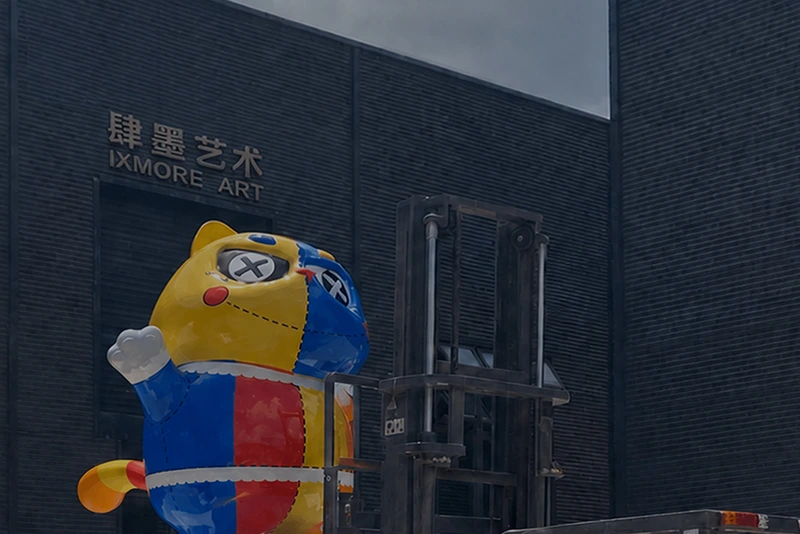
November 3, 2026 Ixmore Art
In large shopping malls, commercial complexes, major brand pop-ups, and public space projects, a visually striking installation has to do more than look distinctive. It must also satisfy a demanding set of requirements, including structural safety, material performance, surface quality, and dimensional accuracy. In recent years, a growing number of commercial projects have incorporated oversized sculptural pieces, mirror art installations, interactive photo installations, and immersive themed environments, all of which place greater demands on the design, engineering, and fabrication capabilities of the production facility. For buyers, choosing a professional installation and prop manufacturer is not simply a question of whether concept drawings can be realized. It also means assessing whether the supplier has the end-to-end capability to turn a complex creative vision into a finished product that is stable, precise, and ready to install.
From a manufacturing standpoint, complex forms typically involve three-dimensional structural breakdown, curved-surface processing, mold development, and the integration of multiple materials. Special surface effects call for control over substrate preparation, coating systems, color consistency, and detail finishing. The precision of the finished piece, meanwhile, depends not only on machining equipment but also on upfront modeling, production tolerances, staged assembly, and on-site installation. Drawing on these key stages, this article examines how complex forms, surface textures, and finished-product precision can be managed in large-scale commercial installation projects, from creative design through factory production to final delivery.
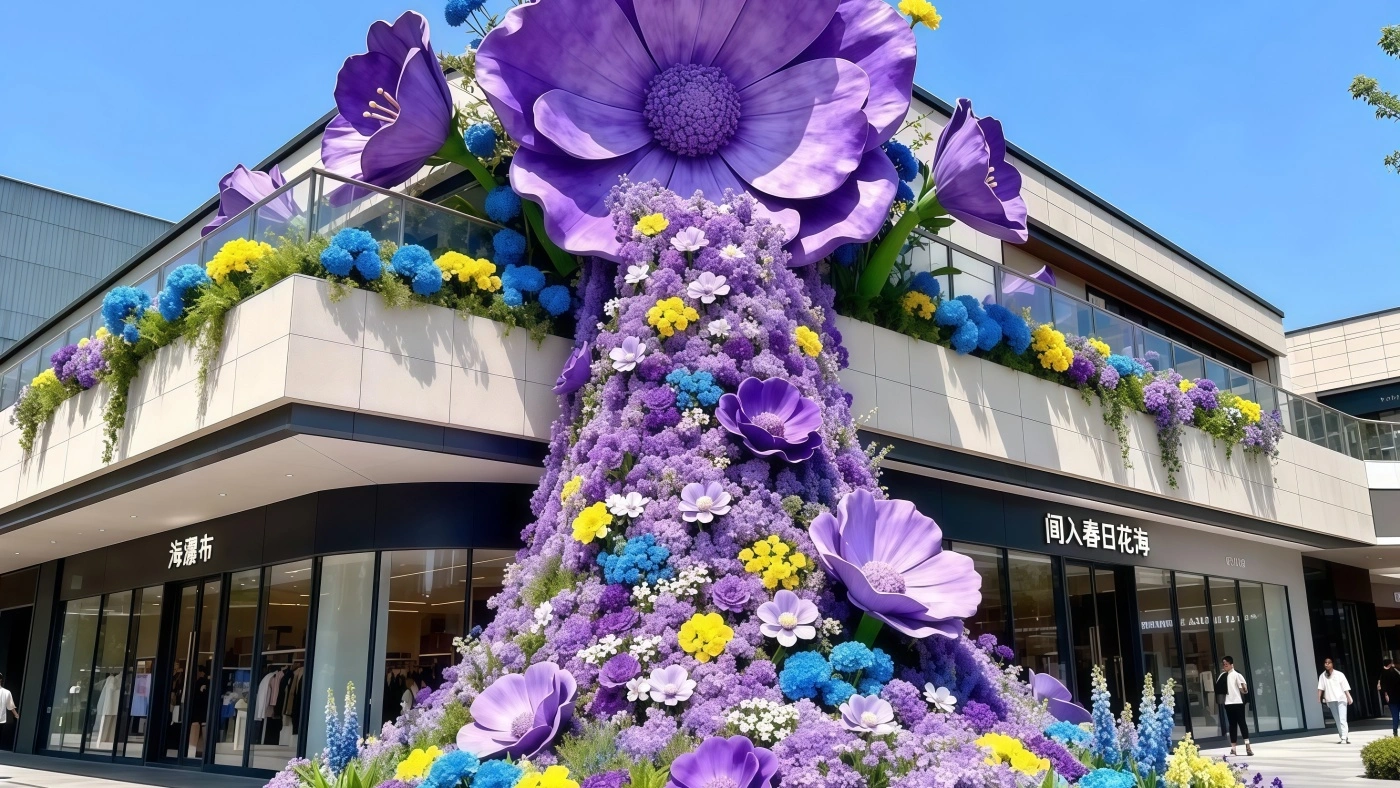
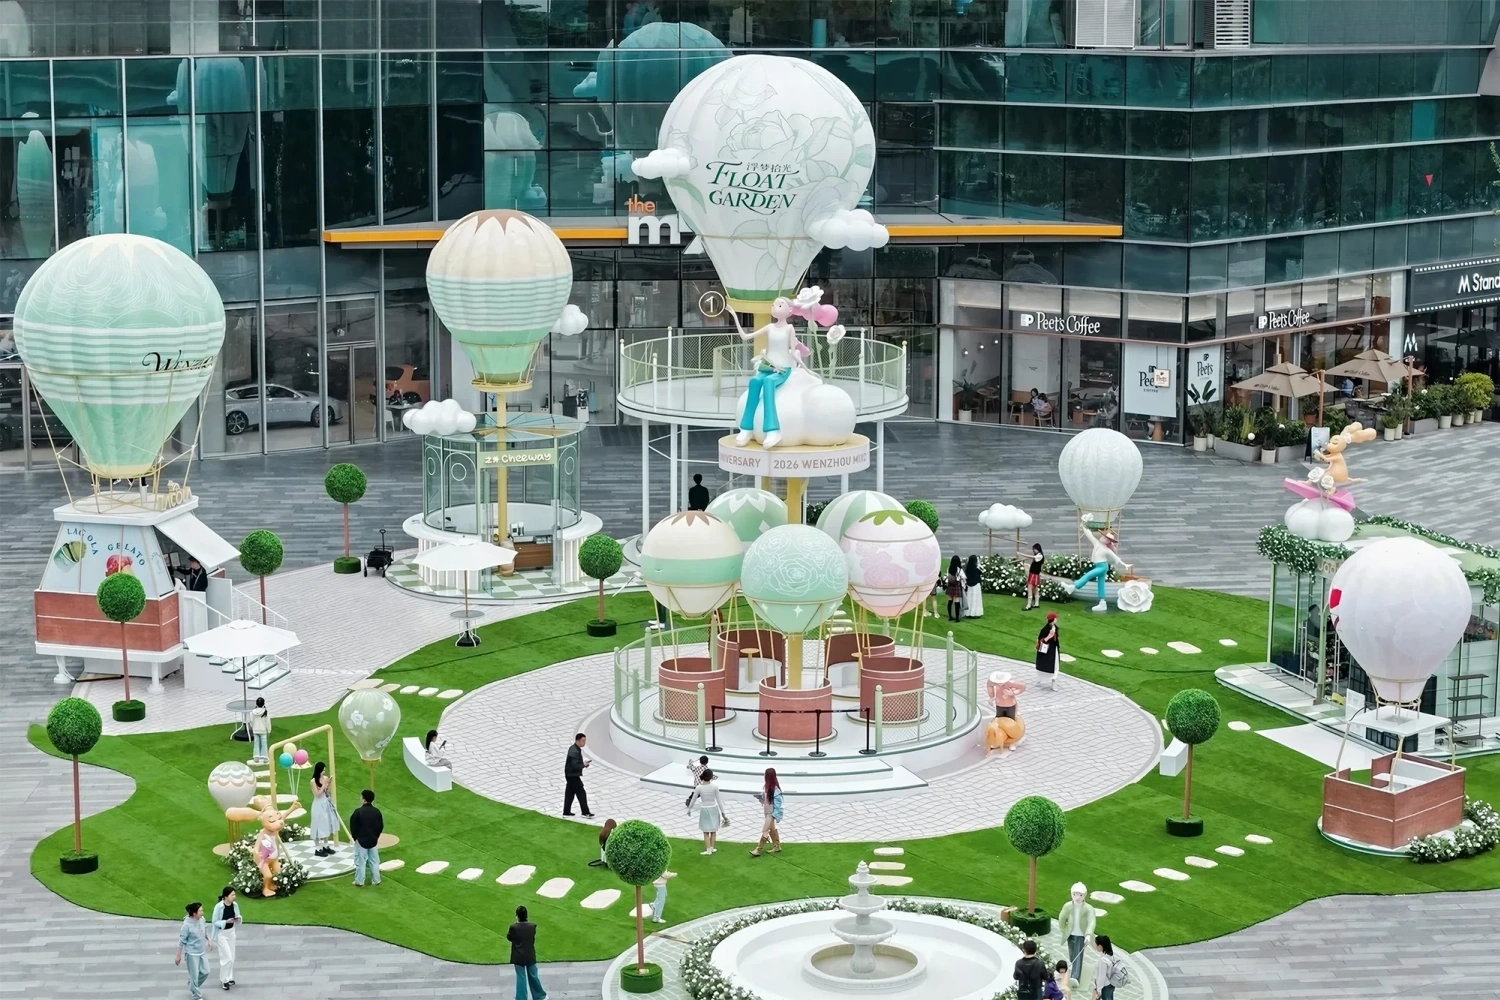
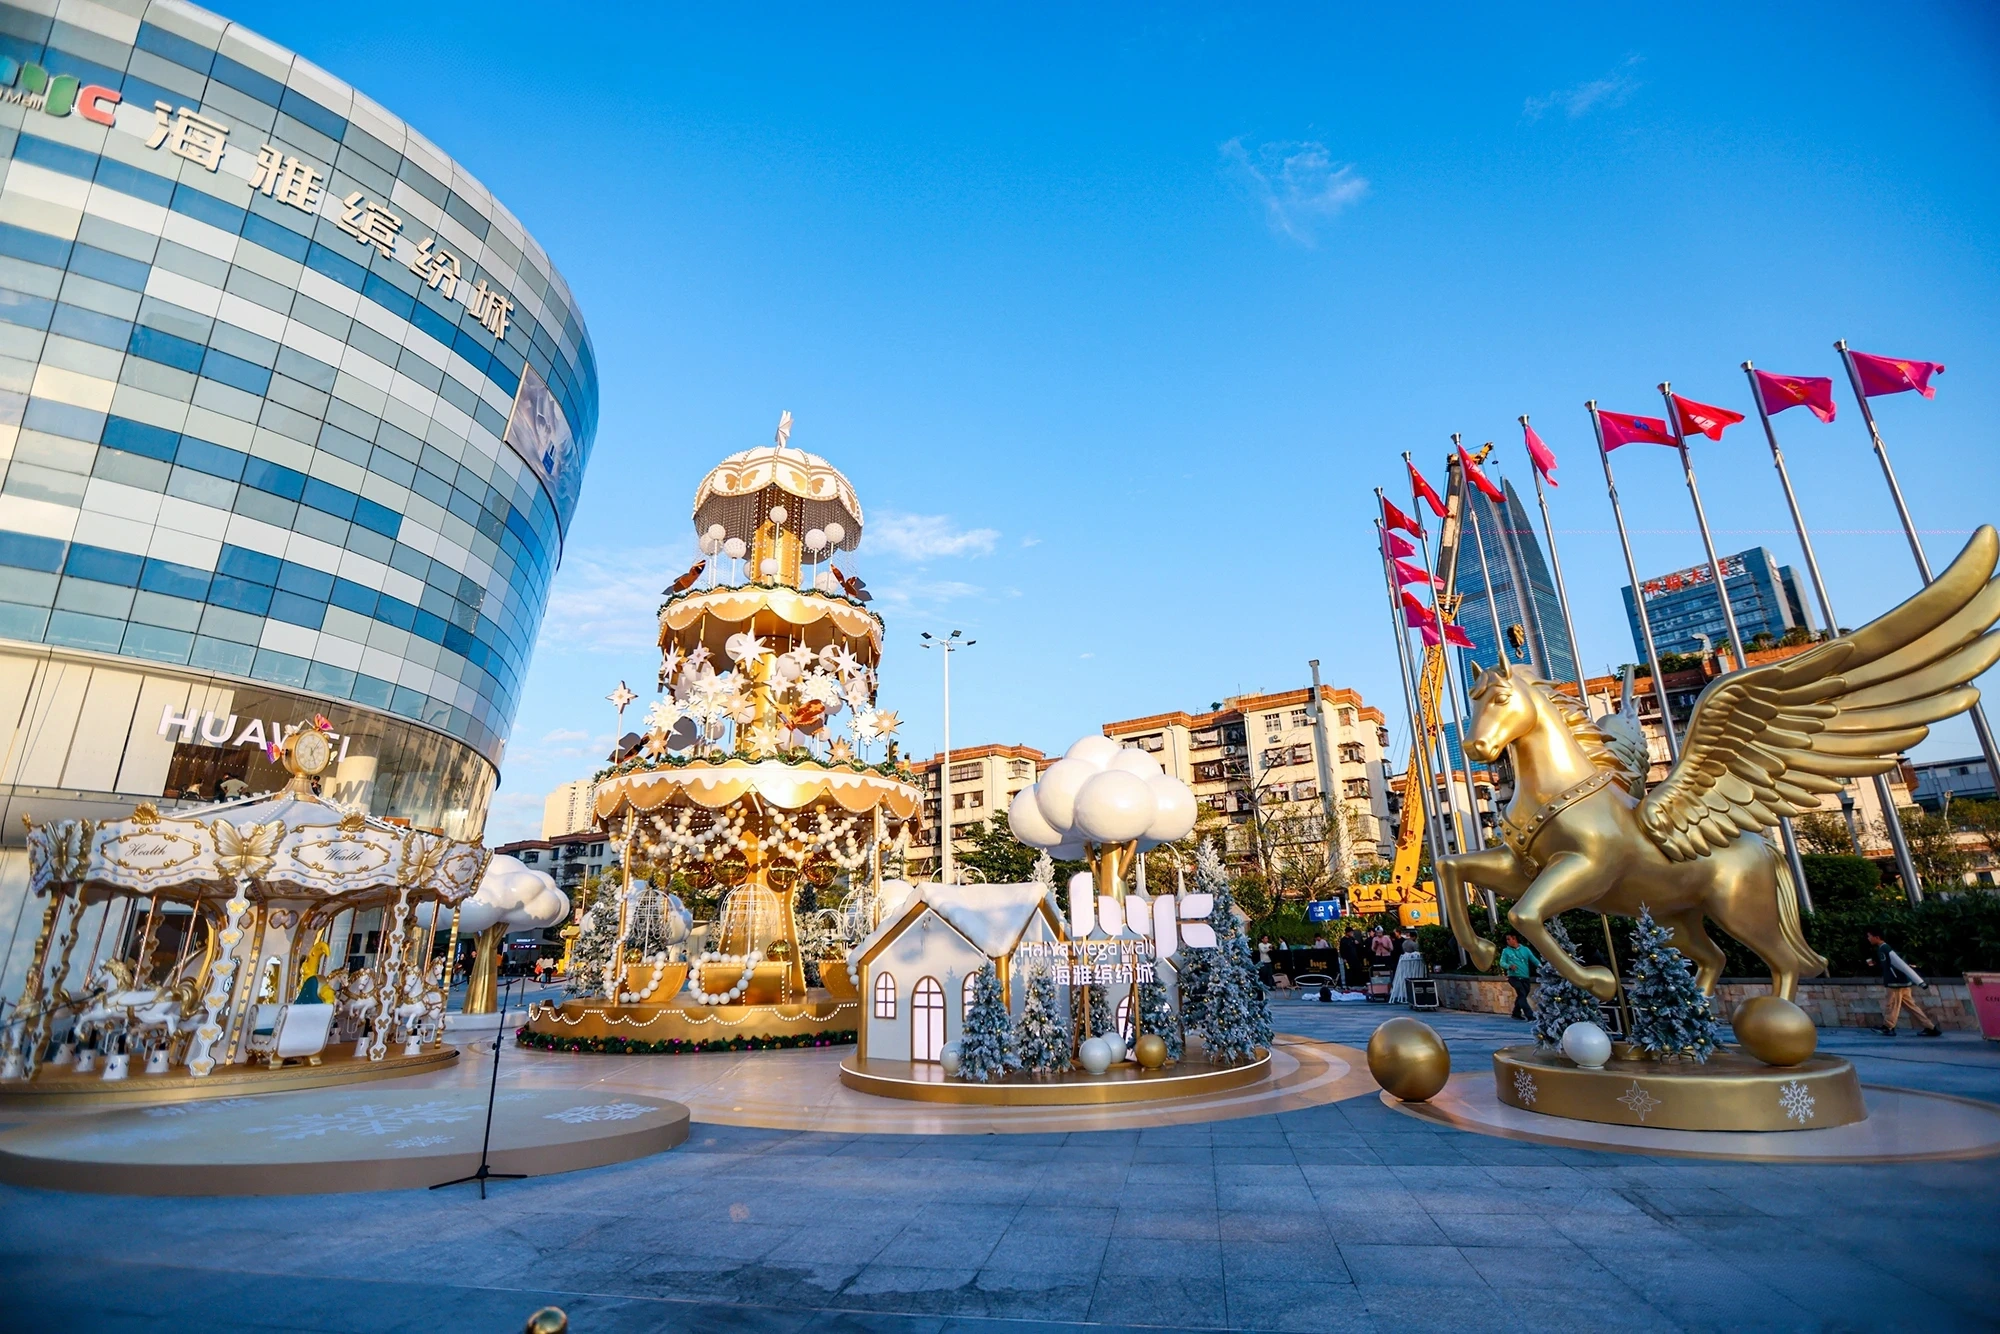
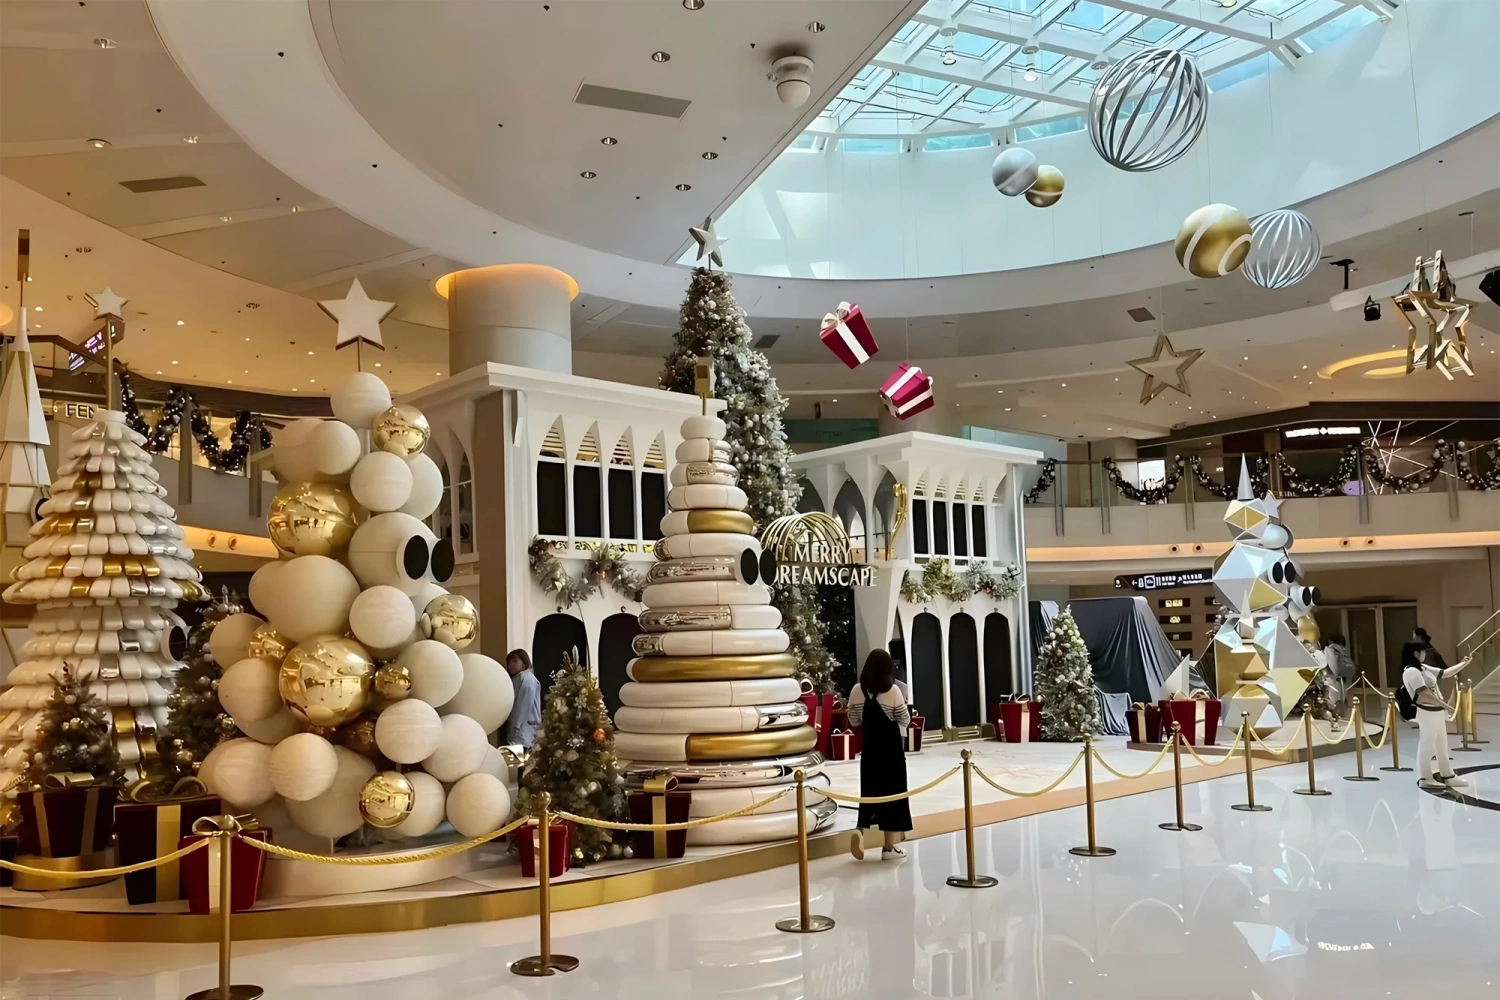
Compared with conventional display pieces, social-media-friendly photo installations tend to be large in scale, irregular in form, rich in visual detail, and designed to be viewed from every angle. They are usually placed in mall atriums, commercial plazas, brand event spaces, or other high-traffic public areas, where visitors will not only view them head-on but also approach them, walk around them, take photos, and even engage with them interactively.
Because of this, three questions must be addressed in parallel during production.
Design renderings are made to emphasize visual appeal, whereas the manufacturer must go further and determine whether the form can actually be produced. Wide-span cantilevers, asymmetrical curved surfaces, large-scale perforated forms, and irregular three-dimensional sculptures all call for structural breakdown and a manufacturing process review.
If a surface is built straight from the rendering, without first planning the internal supports, joints, and segmentation method, problems such as structural deformation, joint misalignment, and insufficient load-bearing capacity in certain areas can follow.
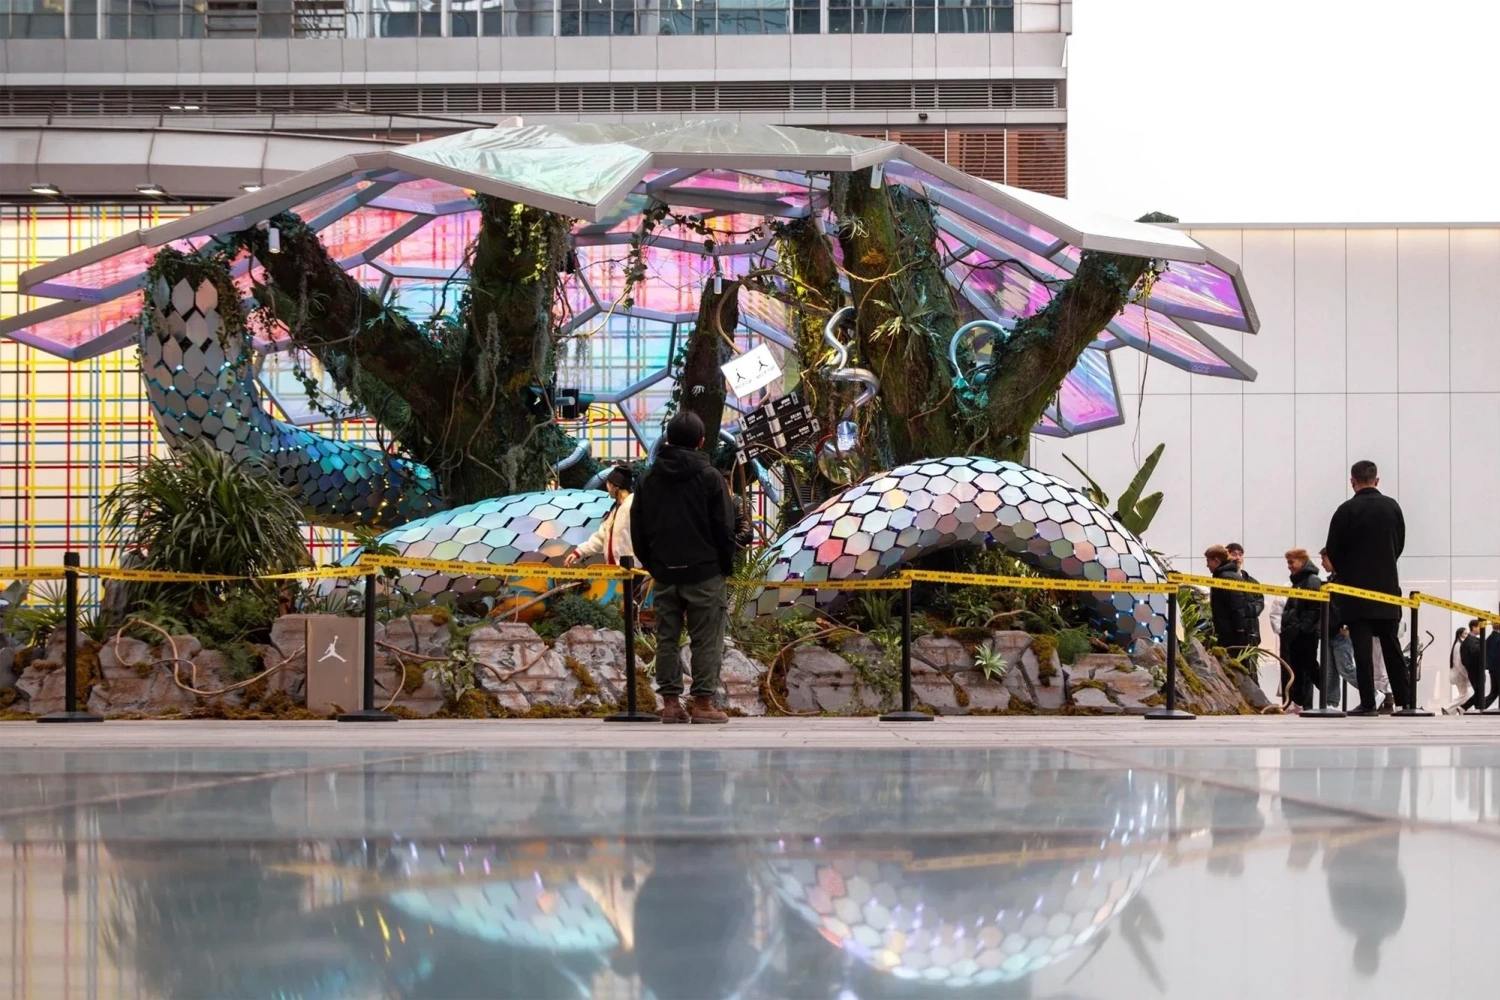
Surface requirements vary significantly from project to project. Mirror-polished stainless steel, for instance, must minimize weld marks and surface waviness. High-gloss paint must deliver a flat surface with controlled reflections. Finishes that imitate stone, metal, or other specialty textures have to be achieved through a combination of materials and coating processes. These visual details have a direct bearing on the final photographic result, and they are also what set large-scale commercial installations apart from ordinary display environments.
Large-scale installations are rarely a single part. They are assemblies of metal frames, exterior cladding panels, connecting hardware, decorative elements, and functional structures. Without unified dimensional standards across these components, on-site assembly becomes difficult, and the result can be uneven joints, distortion, or an irregular surface.
A well-planned installation fabrication workflow therefore treats design, structure, materials, machining, surface finishing, and installation as one integrated manufacturing system rather than a series of disconnected production stages.
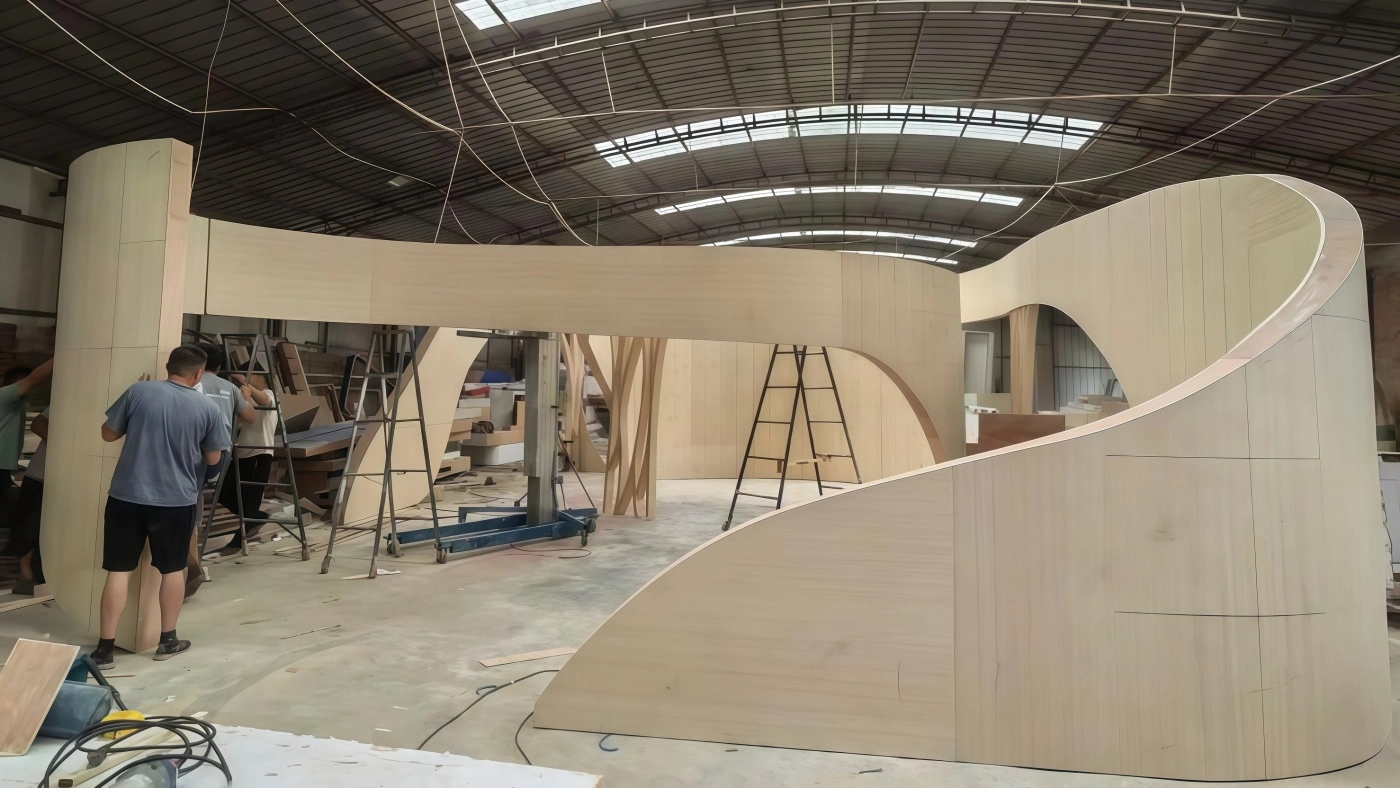
Complex form is one of the most significant technical challenges in producing large-scale photo installations. Addressing it takes more than manual shaping. It requires digital modeling, structural breakdown, material selection, and fabrication processes working in concert.
Before production begins, the concept drawings, dimensional data, and form references supplied by the design team must first be converted into a production-ready 3D model.
For large-scale art installations with irregular forms, 3D modeling helps the manufacturer pin down the following:
Overall length, width, and height, plus the dimensions of the primary contours.
Surface transitions, curvature changes, inflection point locations, and form proportions.
The spatial relationship between the internal framework and the exterior decorative layers.
Joining methods and assembly positions for components.
The structural interfaces required for phased delivery, on-site assembly, and future maintenance.
Consider an interactive photo installation with large, sweeping curved contours. If it is built from 2D drawings alone, it is difficult to control the transitions between different curved surfaces with any accuracy. A 3D model allows the surfaces to be segmented in advance and the joint positions to be planned, laying the groundwork for subsequent CNC machining, mold making, or hand forming.
For sculptures with highly detailed forms, critical sections can also be modeled individually to prevent proportional distortion when the piece is scaled up for fabrication.
Large-scale installations must account for factory machining limits, transport constraints, site access conditions, and installation methods, so producing them as one complete piece is often impractical.
Phased fabrication of a large installation has to balance the integrity of the form against the reliability of the structural joints.
Common approaches include:
Dividing the structure into independent modules along the form’s contours and natural inflection points.
Designing the internal load-bearing structure and the exterior decorative layer separately.
Fabricating large curved surfaces in stages, then joining them through a mounting structure.
Building in the necessary installation clearance and adjustment allowance at connection points.
Concealing seam lines wherever possible along natural contours, decorative edges, or visually inconspicuous locations.
It is worth noting that more segments do not necessarily make production easier. Too many joints add to the on-site adjustment workload and increase the risk of joint misalignment. The segmentation plan must therefore balance dimensional accuracy, transport conditions, production efficiency, and installation cost.
Complex designs typically call for a combination of materials rather than a single material expected to perform every function.
For example:
FRP (Fiber-Reinforced Plastic): Well suited to sculpture shells, three-dimensional surfaces, specially shaped decorative components, and designs with fairly complex contours. Molding and layered lamination allow a wide range of three-dimensional forms to be achieved.
Metals: Steel, stainless steel, and aluminum profiles are commonly used for internal frames, support structures, connecting components, and parts that require high structural rigidity. The specific material and cross-sectional dimensions must be determined from the load, span, service environment, and structural calculations.
High-density foam: Can be used for certain lightweight designs, as a sculptural base layer, and to form complex contours. However, it usually still needs surface reinforcement and further finishing, so ordinary foam should not be treated as a load-bearing material.
Wood and boards: Suitable for some flat structures, internal base layers, formwork, and decorative components. Material selection must account for ambient humidity, fire-resistance requirements, and load-bearing needs.
For large, custom-built commercial installation projects, the most sensible approach is usually to assign materials by function: the internal structure provides support, the exterior materials define the form, and the surface system delivers the visual effect. This approach helps keep overall weight under control and also simplifies further processing, transport, and maintenance.
For large-scale, signature installations that thrive on social media, surface appearance is often the first thing consumers notice. Even when the overall proportions are accurate, uneven surfaces, a rough paint texture, color variation, protruding weld seams, or distorted mirror reflections will significantly diminish the final visual quality.
Surface finish management should therefore be treated as a distinct quality control stage.
Whether the substrate is FRP, metal, or foam, surface treatment has to start with the base layer.
Take an FRP sculpture as an example. After demolding, it may show seams, localized air bubbles, or an uneven surface, so repairs, sanding, and leveling must be carried out according to the actual condition of the part.
For metal structures, the focus must be on welds, spot welds, cut edges, and joint areas. On mirror-like or highly reflective surfaces in particular, localized dents and weld marks become far more visible because of reflection, so any necessary repairs must be completed before surface treatment begins.
It is recommended to establish inspection points for the base coat during production, rather than waiting until the final spray coating is finished and then inspecting everything for defects in one pass.
Different visual effects require different surface treatment materials and methods.
High-gloss painted surfaces: Typically require primer repair, primer application, a leveling coat, the final paint application, and any necessary protective treatment. During production, close attention must be paid to the spray environment, paint film thickness, leveling, drying conditions, and surface cleanliness.
Mirror-finish metal surfaces: Material surface quality, weld-induced distortion, sanding direction, and polishing level must all be controlled. For large mirror-finish areas, it is also necessary to confirm that the reflection lines remain continuous after the sections are joined in stages.
Stone and wood-grain imitation finishes: These are achieved through base coloring, texturing, color transitions, and a protective coating. The process relies heavily on physical sample verification to avoid noticeable differences in texture or color between modules.
Special textured surfaces: Sand textures, natural textures, grain effects, and three-dimensional patterns, for example, require the right molding, spraying, or hand-finishing method to be determined according to the design requirements, with the final result confirmed against physical samples.
On large-scale custom projects, it is not advisable to finalize the surface finish based on rendered images alone.
This is because color, light reflection, and texture look different on screen than on the physical object. The same color, for instance, can appear markedly different on matte, glossy, and metallic paint surfaces, and lighting conditions will also affect the final appearance.
A more prudent approach is to produce physical material samples before mass production in order to confirm:
Color and color saturation.
Gloss level and reflection effects.
Surface texture, grain, and feel.
Seam placement and edge finishing methods.
Compatibility between the paint coating and the base coat.
For projects that require an assessment of paint adhesion, refer to ISO 2409:2020, Paints and Varnishes — Cross-Cut Test. The standard describes a test method for evaluating a coating’s resistance to separation from its substrate or from a previous coating. It is not, however, a method that directly measures adhesion strength, and it does not apply to coatings with a total thickness above 250 µm or to textured coatings. The appropriate test method must therefore be selected based on the coating system, the substrate, and the project requirements.
Proper sample verification and quality testing allow potential issues to be caught before mass production, reducing rework and material waste.
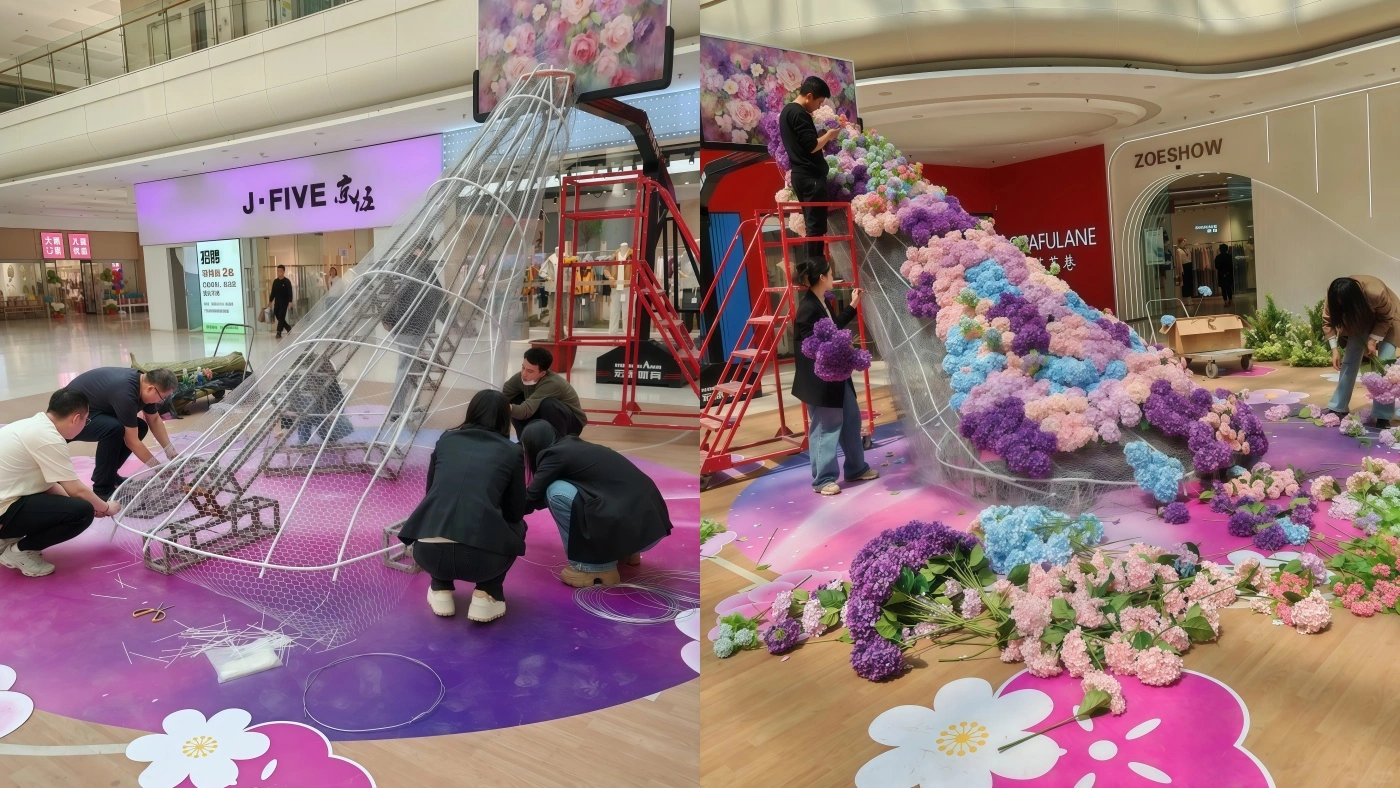
For interactive art installations or complex sculptures made up of many components at large scale, the precision of the finished product affects not only visual quality but also whether the modules can be assembled smoothly.
This is especially true for large projects involving cross-border shipping and on-site assembly. If the manufacturer focuses only on the dimensions of individual components without considering how the whole assembly fits together, components are likely to be misaligned on site.
Before production, the overall reference dimensions of the structure, key positioning points, hole locations, joint faces, and critical contour dimensions must be clearly defined.
For example, a three-dimensional sculpture made up of several separate modules requires clearly defined joint positions, centerlines, and joint dimensions for each module. Otherwise, even if every module looks fine on its own, overall misalignment can appear once they are assembled.
For engineering drawings and dimensional control, refer to the following:
ISO 1101:2017, Geometrical Product Specifications (GPS) — Geometrical Tolerancing — Tolerances of Form, Orientation, Location and Run-Out, which establishes the symbolic language and interpretation rules for geometrical tolerances.
ISO 22081:2021, Geometrical Product Specifications (GPS) — Geometrical Tolerancing — General Geometrical Specifications and General Size Specifications, which provides rules for defining and interpreting general geometrical specifications and general size specifications.
It should be emphasized that these standards do not mean every large-scale art installation must use the same tolerance values. In actual projects, key dimensions and acceptance criteria still have to be agreed jointly by the designer, manufacturer, and buyer, taking into account material characteristics, processing methods, assembly structures, and visual requirements.
Finished-product precision should not be left to final acceptance. It must be controlled throughout the entire production process.
Reasonable inspection methods include:
Once the frame is complete, checking the overall dimensions, diagonals, and the positions of the main joints.
After contoured or specially shaped components are formed, checking that the main contours conform to the design model.
After module machining is complete, checking the positions of mounting holes, the placement of connecting components, and joint dimensions.
Before surface treatment, checking joint connections, structural flatness, and the primer layer.
After final assembly, checking the overall proportions, joints, verticality, and visual contours.
For large products, inspections can be supported by a tape measure, laser distance meter, level, positioning clamps, or 3D scanning, depending on the product’s size, precision requirements, and form.
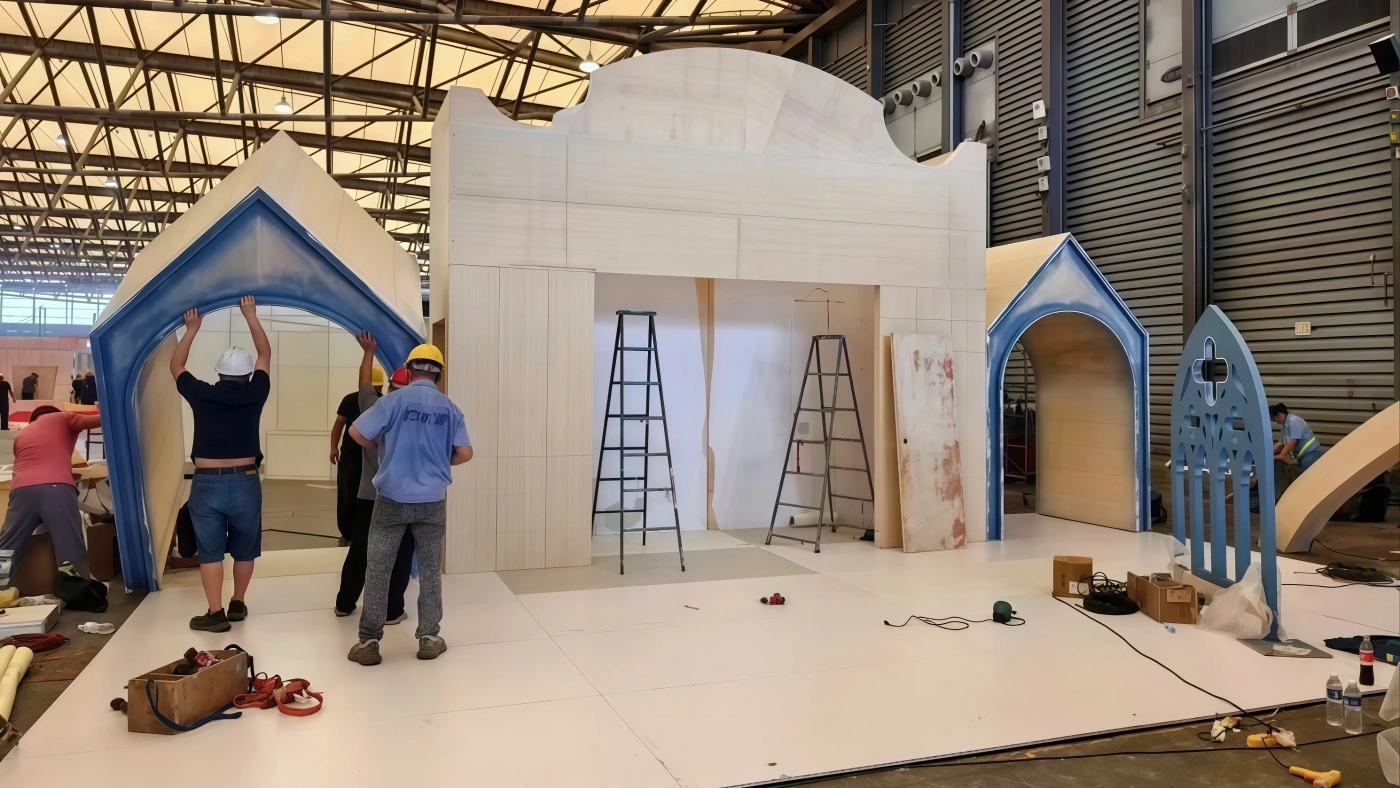
For large installations intended to become go-to photo spots for influencers, factory pre-assembly is a critical step in reducing on-site installation risk.
This applies especially to pieces with many irregularly shaped modules, concealed joints, overhanging structures, or specialized decorative interfaces, where a trial assembly before shipment is recommended.
Pre-assembly should concentrate on the following questions:
Do the connection points on each module line up correctly?
Are there any misalignments or obvious defects in the structure?
Does the overall form match the approved rendering?
Do the joints and edges meet the aesthetic requirements?
Are the interfaces for lighting, electrical, or interactive components correct?
Is the disassembly and reassembly sequence logical and practical for on-site work?
If a module turns out to need significant cutting or adjustment on site, that points to a problem in the original structural breakdown or dimensional control, and it must be resolved at the factory stage as a priority.
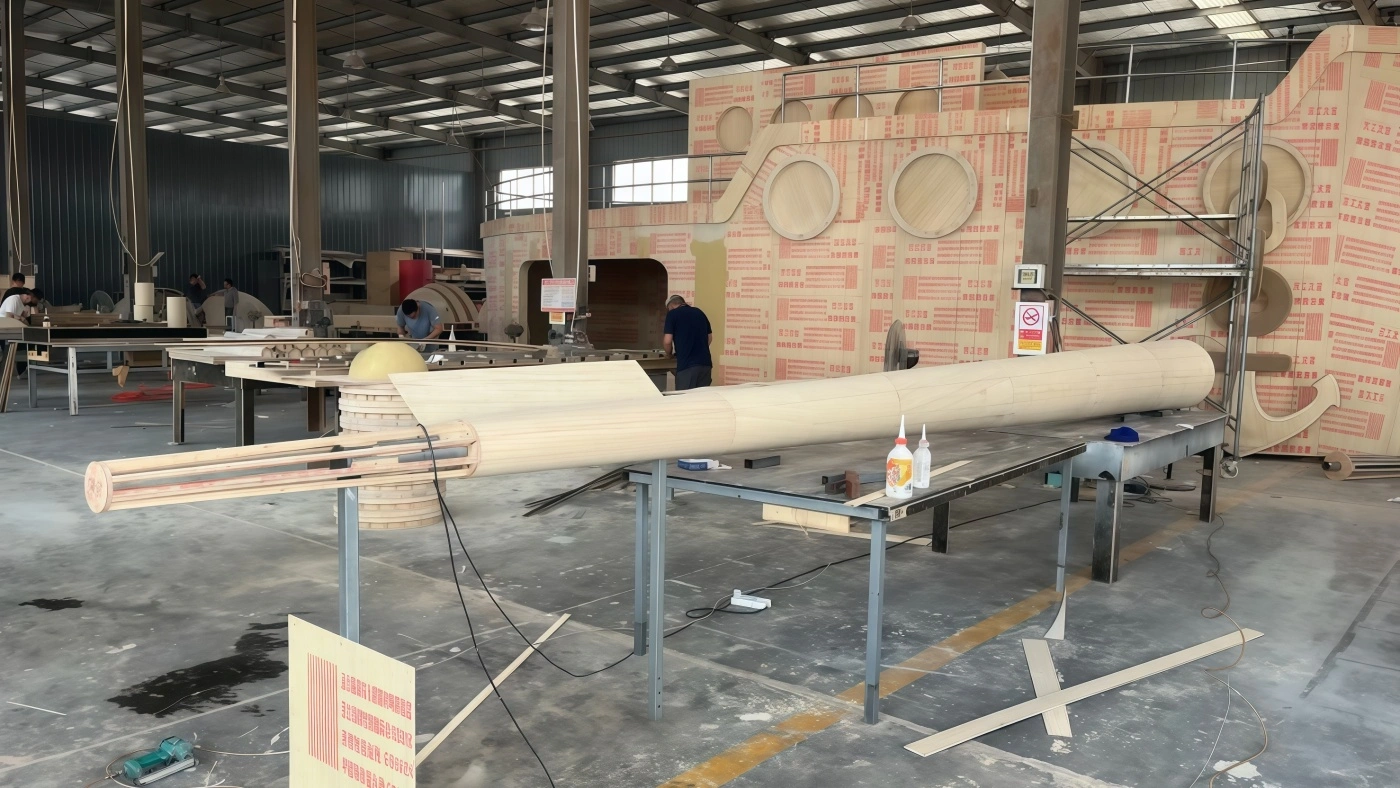
Beyond design and appearance, large-scale installations must also account for the actual operating environment. Mall atriums, open plazas, commercial districts, and temporary event spaces each differ in load conditions, crowd flow management, environmental factors, and installation constraints.
For large cantilevered sculptures, three-dimensional gateways, roof-mounted installations, and towering art pieces, special attention must be given to dead load, center of gravity, support methods, connections, and installation methods.
Outdoor installations must also be evaluated for wind load, rain and snow load, and other applicable loads based on local environmental conditions. If the project is in a seismic zone, the relevant structural requirements must also be addressed in accordance with local regulations.
Structural safety cannot be judged simply by increasing the thickness of the internal steel members. Sound structural design must take into account load paths, joint reliability, foundation conditions, and overall stability, and where necessary, calculations and reviews must be carried out by a suitably qualified structural engineer.
Large-scale commercial installations often travel via export routes, so packaging dimensions, container or vehicle limitations, unloading conditions at the destination, and installation routes need to be considered from the factory production stage onward.
For example, a large curved installation can be designed during the planning phase as several connectable modules, then assembled on site using alignment pins, bolted joints, or other suitable assembly methods.
In addition, the manufacturer should provide clear part numbers, installation diagrams, joint location descriptions, and the necessary lifting information, to minimize communication barriers for installation crews at overseas sites.
For projects that must be installed inside an operating shopping center, the installation schedule, equipment access routes, temporary segregated work areas, and on-site safety management requirements also need to be confirmed in advance.
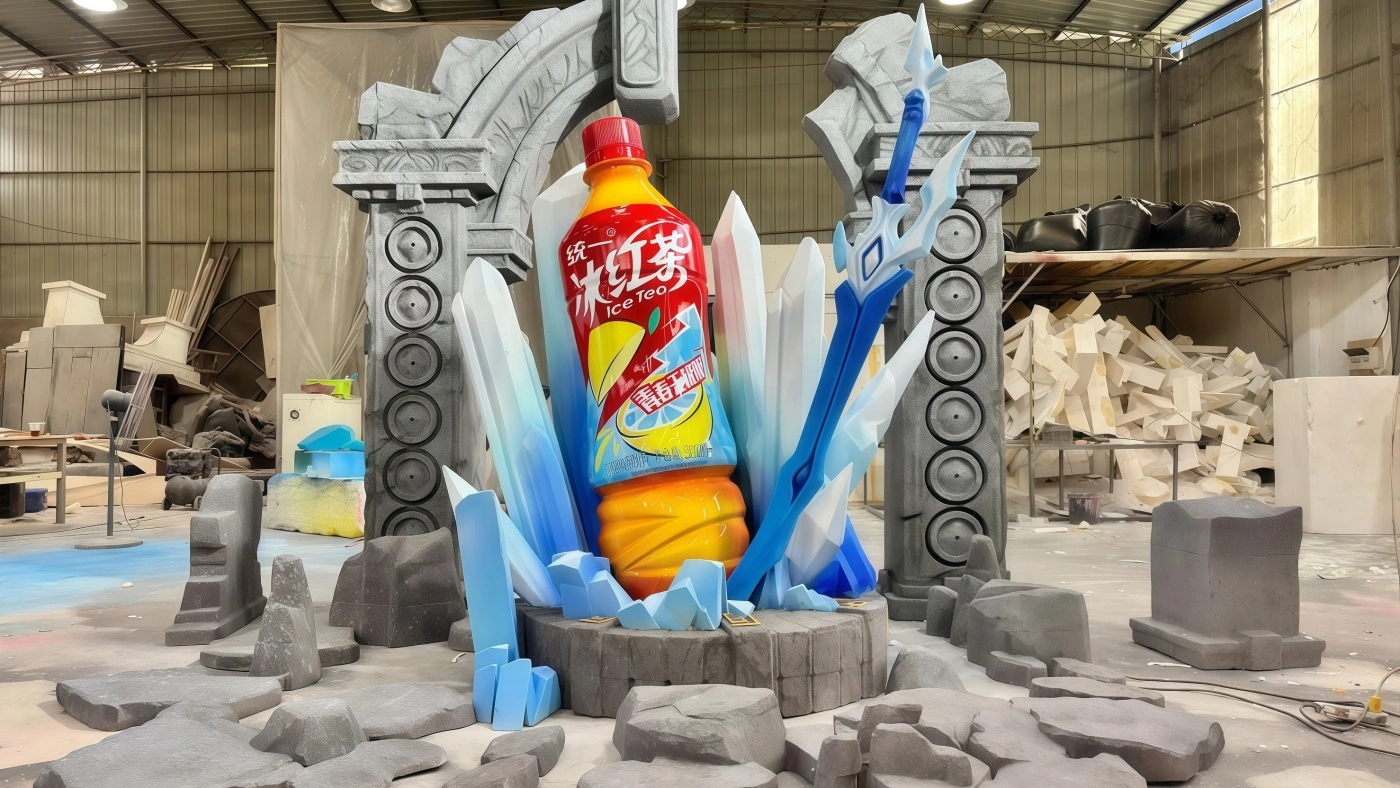
From the buyer’s perspective, assessing whether a supplier is truly capable of fabricating large-scale commercial props and installations takes more than looking at final renderings or promotional photos. It is also necessary to understand whether the production process includes clearly defined quality control checkpoints.
It is recommended to examine the following steps closely:
Confirm the project dimensions, form, usage scenario, material requirements, surface finishes, budget range, delivery terms, and delivery dates.
For complex projects, it is also important to verify that the design documentation is complete and to determine whether the manufacturer’s assistance is needed for further structural development and production feasibility analysis.
Convert the approved design into production models, part drawings, and the necessary machining drawings, and define the structure, materials, joining methods, and production processes.
Prioritize verification of key forms, critical joint sections, and special surface effects. For modules produced in quantity or recurring shapes, it is recommended to confirm the first article before proceeding with subsequent production.
Depending on the product’s characteristics, carry out inspections of the structure, dimensions, primer coat, paintwork, and assembly, and retain the necessary inspection records and on-site photographs.
Before shipment, inspect the exterior appearance, dimensions, connection components, accessory counts, packaging protection, and package labeling.
For pieces with mirror-like surfaces, spray-painted finishes, or complex curved surfaces, appropriate surface protection must also be applied to prevent scratches, impact damage, and deformation in transit.
Provide installation drawings, module numbering, connection instructions, and technical support as the project requires. For projects with complex structures or demanding installation conditions, responsibilities for on-site installation, site conditions, and the scope of related support must be clearly defined from the outset.
A well-integrated factory production process can bring design, machining, and shipping together, reducing miscommunication between teams and making it easier for the buyer to track project progress.
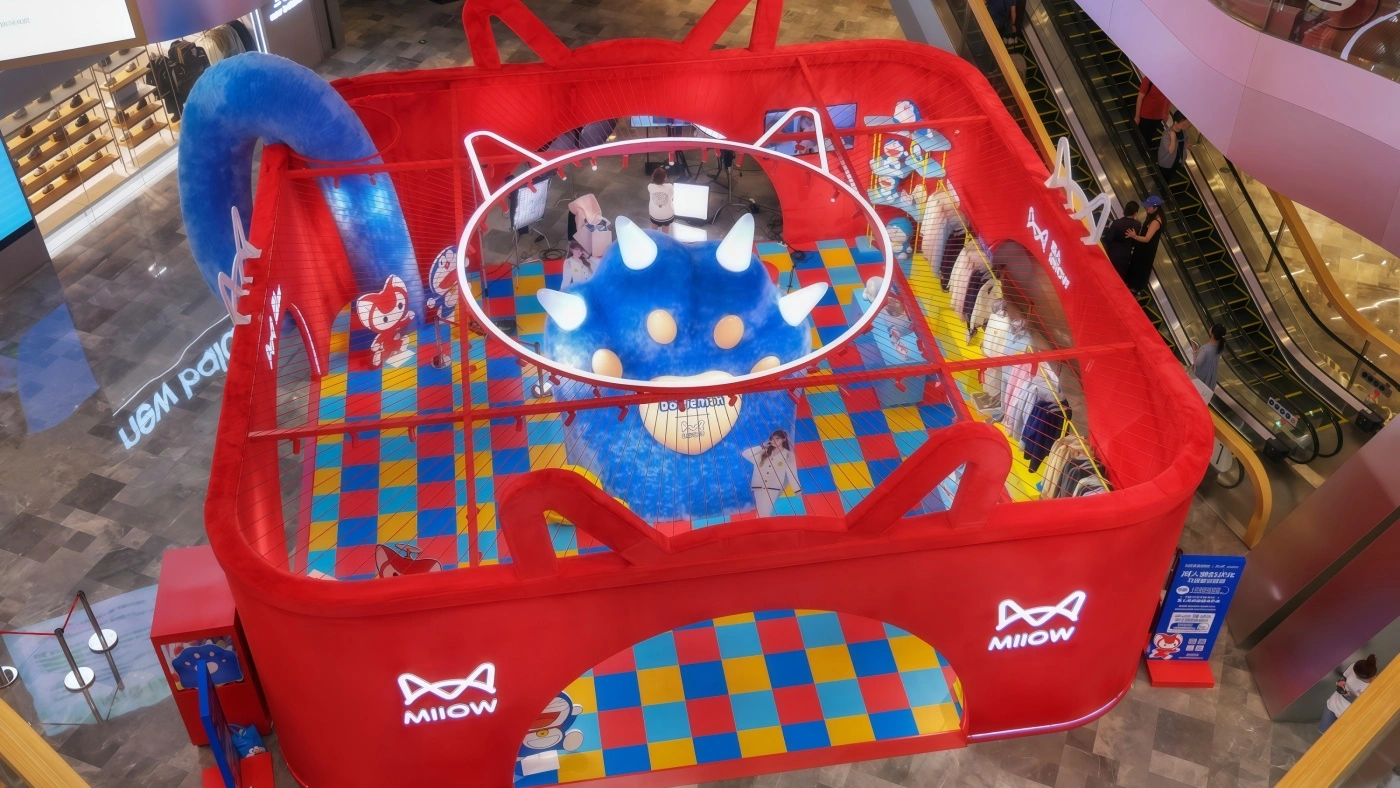
If your project involves large-scale sculptures, interactive photo installations, themed environment installations, or uniquely shaped art installations, you can focus your supplier evaluation on the following areas:
First, does the manufacturer have the capability to translate complex three-dimensional designs into production? Determine whether it can perform 3D modeling, structural development, component cutting layouts, and production feasibility analysis starting from concept drawings.
Second, does the factory have material processing capabilities suited to the project, such as metal structure fabrication, FRP molding, curved surface fabrication, mold development, and specialized surface treatments? The emphasis should be not on the quantity of equipment but on how well the equipment and processes fit your project.
Third, does the manufacturer have experience in multi-material fabrication? Large-scale installations typically combine different materials such as metal, fiberglass, sheet metal, foam, and coatings, so the manufacturer must be able to integrate these materials and coordinate the processes involved.
Fourth, are there clearly defined processes for dimensional measurement and pre-assembly? You can ask the supplier for in-progress photos of similar projects, dimensional inspection records, trial assembly photos, or pre-shipment acceptance documents.
Fifth, can the factory handle the shipping and on-site installation requirements of international projects? For overseas buyers, finishing production does not mean the project is complete. Packaging, cross-border shipping, on-site assembly, and technical communication are equally important.
If a project places high demands on form, structure, and appearance, it is advisable to hold technical meetings, confirm prototypes, and review the production plan before signing the formal contract, so that the manufacturer fully understands the project’s requirements.
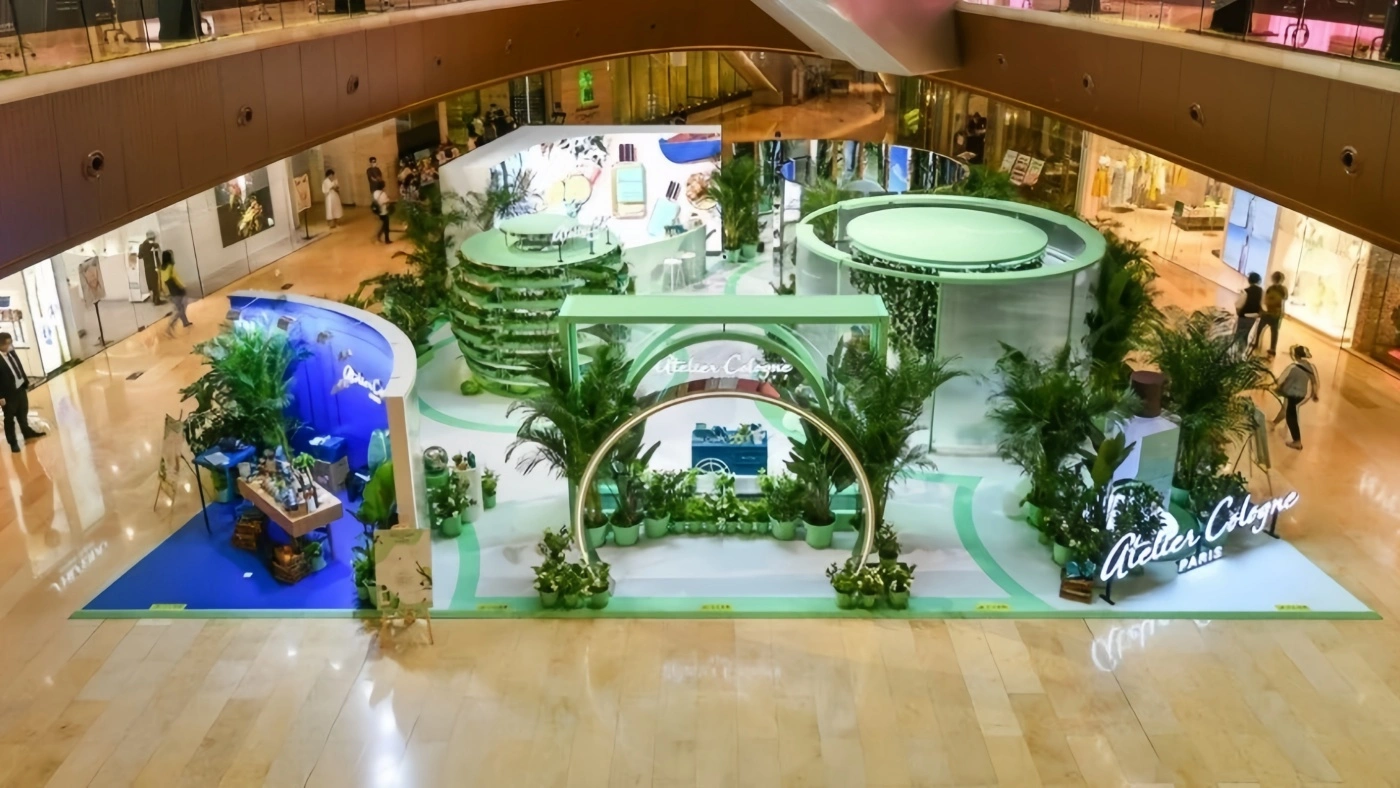
Large-scale installations that go viral on social media are not simply design concept images scaled up and produced. Complex curved surfaces must be realized through 3D modeling, structural analysis, and material forming. Specialized surface textures depend on primer preparation, paint control, and prototype validation. The precision of the finished product must be secured through unified dimensional standards, checkpoint inspections at key stages, and factory pre-assembly.
For commercial venue operators, brand teams, and event planning companies, supplier selection should weigh a supplier’s overall capability, spanning design development, structural fabrication, surface treatment, quality testing, and international shipping, more heavily than a simple comparison of unit prices.
A professional manufacturer offering a comprehensive solution should be able to turn creative designs into physical pieces that can be produced, shipped, and installed, and that meet the project’s acceptance criteria. Only a scientific installation and prop production workflow can truly bring complex creative forms to life and deliver the intended visual impact and user experience in the finished commercial space.
Commonly used materials include FRP (Fiber-Reinforced Plastic), steel, stainless steel, aluminum profiles, wood, sheet metal, and high-density foam. The right choice depends on the installation’s size, the complexity of its form, structural loads, whether it is indoors or outdoors, and the desired surface finish. Large-scale projects are typically built from a combination of materials.
Yes. The typical sequence starts with 3D modeling and structural analysis, followed by selecting a process, such as CNC machining, mold casting, metal bending, FRP molding, or hand finishing, based on the characteristics of the form. For shapes with complex curvature changes, the actual forming results should be confirmed through prototypes or preliminary samples.
Control must be applied at every stage, from the base material layer, welding procedures, and sanding and leveling to primer application and the final coating. For mirror-like and glossy surfaces, weld joints, surface waviness, and localized dents require dedicated inspection. For multi-module products, color variation is controlled through color samples and unified finishing standards.
It is recommended to define dimensional references, key joint points, and assembly tolerances clearly and uniformly during the design phase; carry out phased inspections of the frame, shaped modules, and joint interfaces during production; and perform a factory pre-assembly prior to shipment. For structurally complex products, the positioning structure and installation adjustment allowance should also be planned in advance.
Yes. For large-scale installations, the factory can design the piece as several independent modules to suit shipping conditions and on-site installation requirements, then assemble them with bolts, mounting structures, or other suitable connection methods. The module segmentation plan must weigh visual integrity, packaging dimensions, loading and unloading conditions, and on-site construction conditions at the overseas location.
The production cycle typically depends on the level of design complexity, the workload involved in developing structural details, raw material procurement, mold development, the difficulty of surface treatment, first-article approval, production quantity, and transport and installation requirements. Projects involving special mirror finishes, complex curved surfaces, or multiple rounds of sample approval will need additional lead time.
We recommend asking the supplier for case studies of similar projects, 3D models or detailed manufacturing plans, material and process specifications, key dimensional inspection records, surface finish samples, photos of the factory pre-assembly, and a packaging and transport plan. For large load-bearing or suspended installations, structural calculations and safety verification documents appropriate to the project should also be requested.
July 27, 2026
July 27, 2026

July 27, 2026

July 27, 2026
July 27, 2026

July 27, 2026
July 27, 2026

July 26, 2026

July 26, 2026
July 26, 2026
July 26, 2026
July 26, 2026
July 26, 2026
July 26, 2026
July 26, 2026

July 26, 2026

July 26, 2026
July 25, 2026

July 25, 2026

July 25, 2026